The bulk check feature allows you to upload multiple recipients at one time.
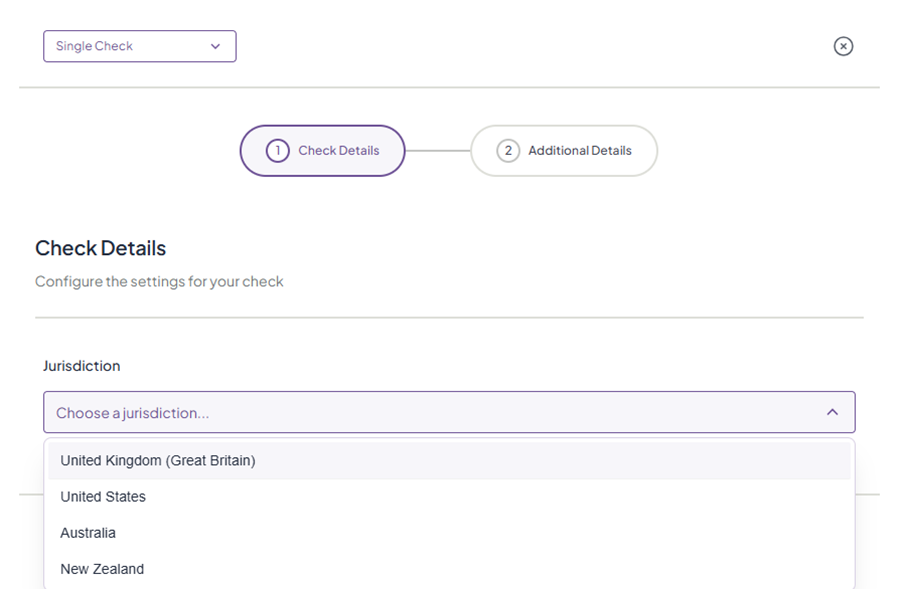
To run an IDV check within the platform, first navigate to the IDV & AML tab from the side of your RFA dashboard. To send out a bulk check, select 'Bulk Check' from the top right corner of the page.

1. First, choose the jurisdiction for your check.
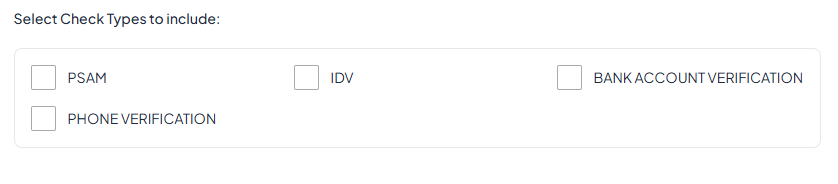
2. Select the check types you would like to include. With a bulk check, you can choose from PSAM, IDV, Bank Account Verification, and Phone Verification; AML is not available for bulk checks. Read more about the types of checks here.
3. Write a reference for your records, and choose whether you would like to Enable Monitoring (please note this is only available for PSAM), Exclude Adverse Media, or enable Exact Match.

4. Adjust the level of fuzziness: the lower the level, the higher the match sensitivity, and the higher the level, the fuzzier the results. Read more about fuzziness here.

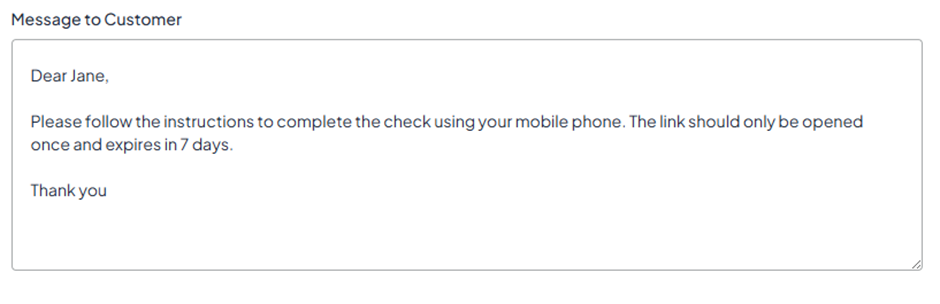
5. Write an optional message for your customer. We recommend that you include a message to let them know what is required. Once you have done this, click 'Next'.
Uploading your CSV file
In order to perform a bulk check, you are required to upload a CSV file containing the relevant information for each of the individuals you would like to include in the check.
Formatting
You can download a sample CSV file before you upload your own. This document shows you the correct formatting for the file and demonstrates the required and optional fields. Please note that field headings must be written in camel case (see below for examples).
You will find more formatting instructions, including date, email, and phone format, in the green box on this page.
There are some details which must be included (Required Fields) and some details which are optional (Optional Fields). Please note that these fields differ for each check, and so the combination of Required and Optional Fields will vary depending on which checks you would like to carry out.
For PSAM
Required: firstName / lastName
Optional: title / middleName / sex / dateOfBirth / email / mobileNumber / landlineNumber
For IDV
Required: firstName / lastName / email
Optional: title / middleName / sex / dateOfBirth / mobileNumber / landlineNumber
For Bank Account Verification
Required: firstName / lastName / dateOfBirth / sortCode / bankAccountNumber
Optional: title / middleName / sex / email / mobileNumber / landlineNumber / addresses
For Phone Verification
Required: firstName / lastName / dateOfBirth / mobileNumber
Optional: title / middleName / sex / email / landlineNumber / addresses
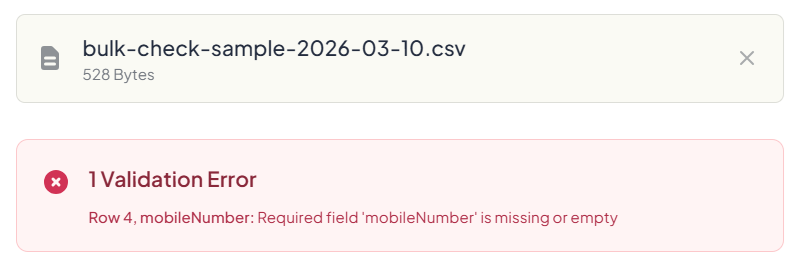
6. Once you have compiled your CSV file, click the box or drag and drop to upload it. Once the system has processed your file, you will see if the file has been validated successfully, and if not, the system will direct you to corrections that need to be made.
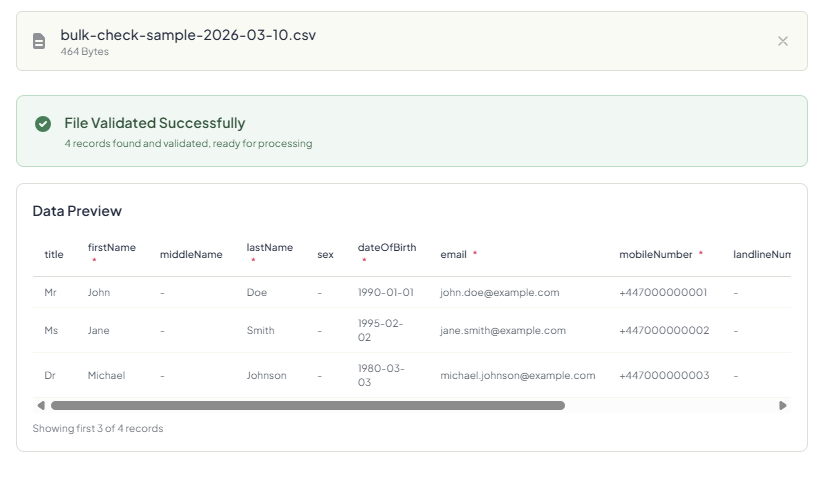
7. Click ‘Create Check’ to process your check.
![]()
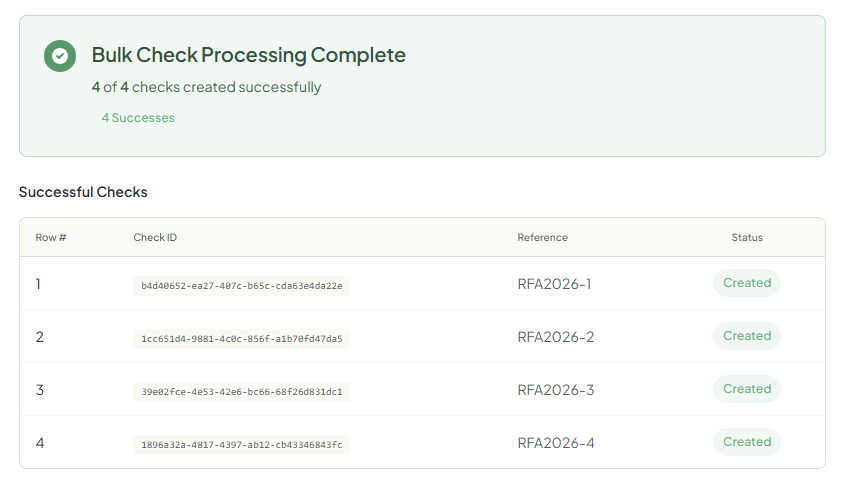
8. Once processed, you will see the successful checks.
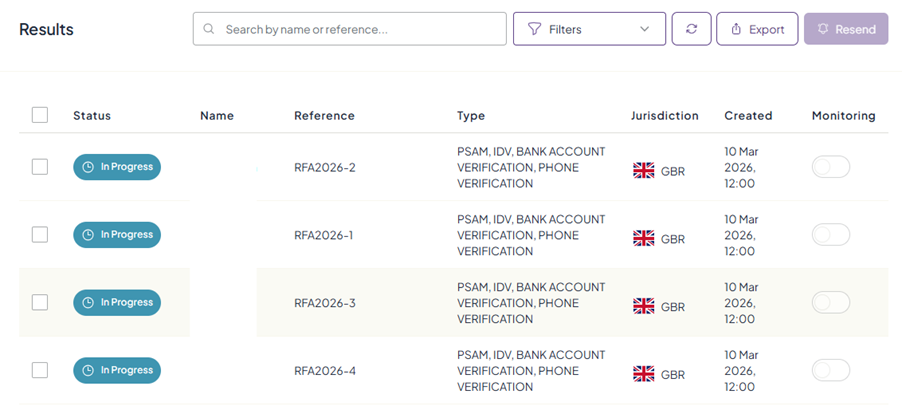
9. The checks will then appear in the dashboard with the status and summary information in both the 'Latest Check' box and the check list. You can click into a report to make notes, see logs, and view the result once a client has completed a check.
Was this article helpful?
That’s Great!
Thank you for your feedback
Sorry! We couldn't be helpful
Thank you for your feedback
Feedback sent
We appreciate your effort and will try to fix the article